Clay and concrete roof tiles
Installation instructions for roof access systems on pitched roofs covered with roof tiles.
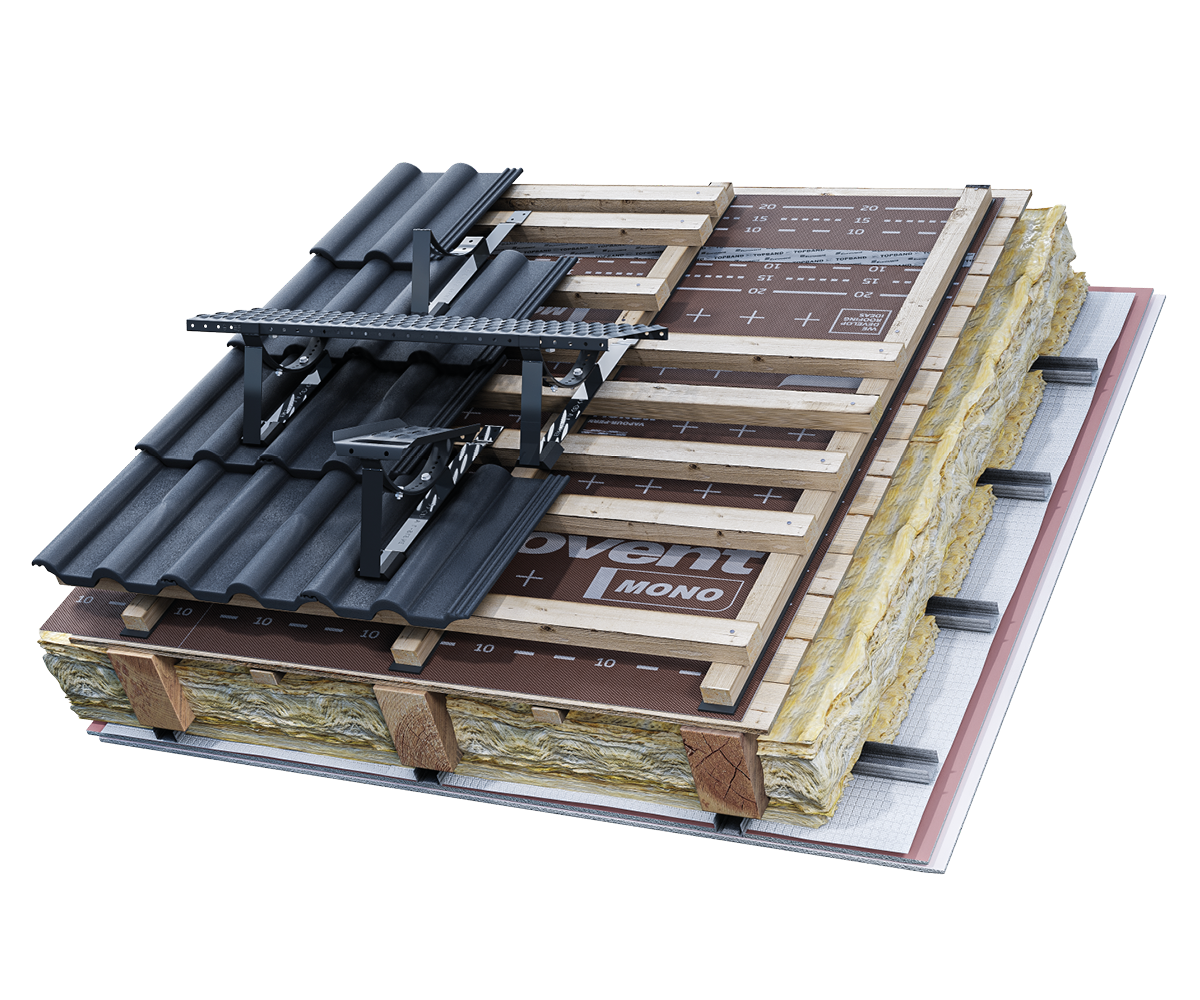
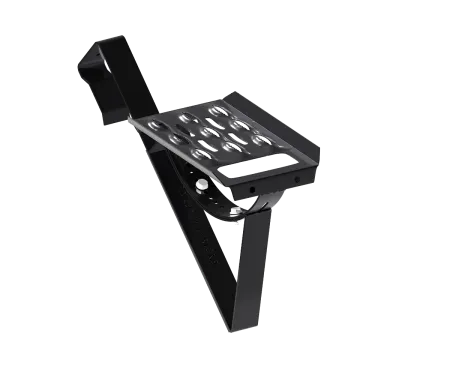
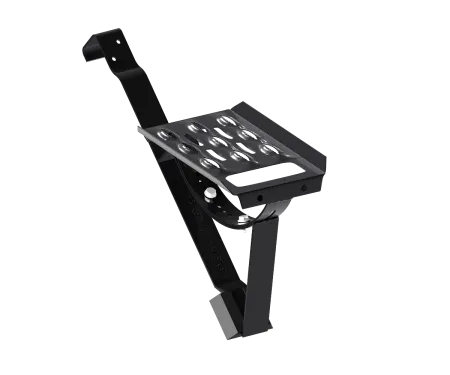
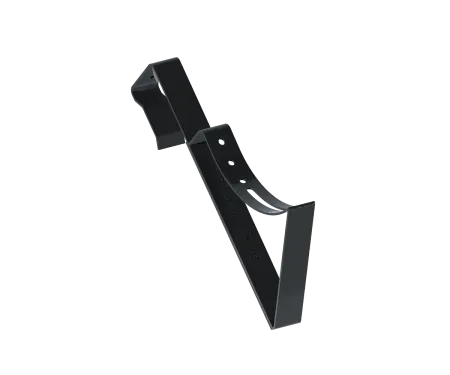
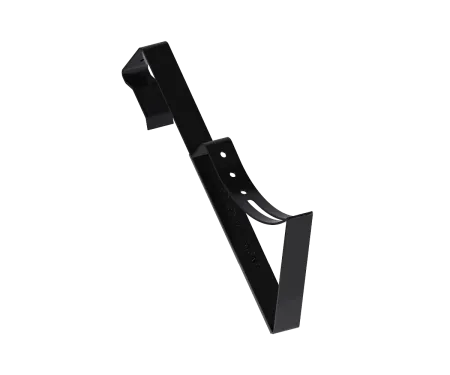
The Eurovent® roof access system is a set of proven components installed on the slope of a pitched roof. It allows safe movement on the roof in accordance with the EN 516 standard. The system consists of the Eurovent® PLATFORM roof walkway, Eurovent® STEP roof step, Eurovent® GRIP cradles, and Eurovent® SUPPORT DB-DC brackets, which make it possible to create functional and durable roof access paths on pitched roofs covered with clay or concrete roof tiles.
The system provides safe and convenient access to chimneys, roof hatches, technical installations and equipment requiring inspection or maintenance, while also improving working comfort on the roof for roofers, chimney sweeps and service technicians, in compliance with building regulations.
Download the installation instructions to your phone:
Download installation instructions
Installation instructions for the following models:

What should you know before installing the Eurovent® roof access system?
Ensure that the structural battens are correctly positioned. The installation requires the use of an additional mounting batten. The roof access brackets must be installed directly to this additional batten.
Before installing the brackets, make sure that the roof covering has been properly installed.
For the installation of the roof access system, only the hot-dip galvanized screws and fastening elements supplied with the set should be used, and, if necessary, appropriate roofing sealants.
What does the roof access system consist of?
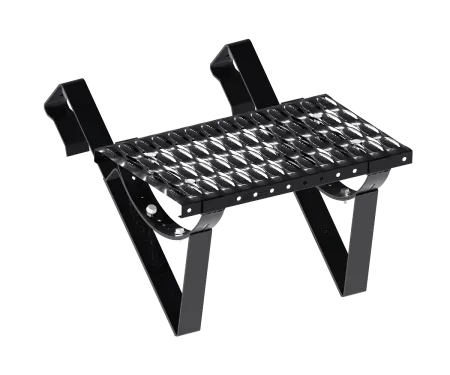
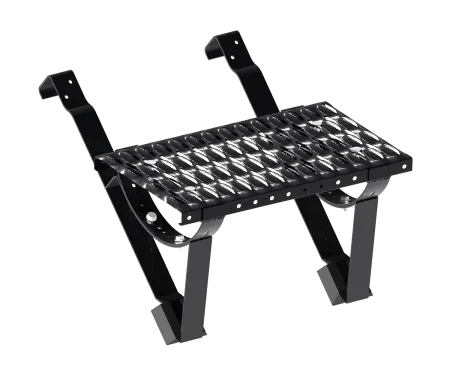
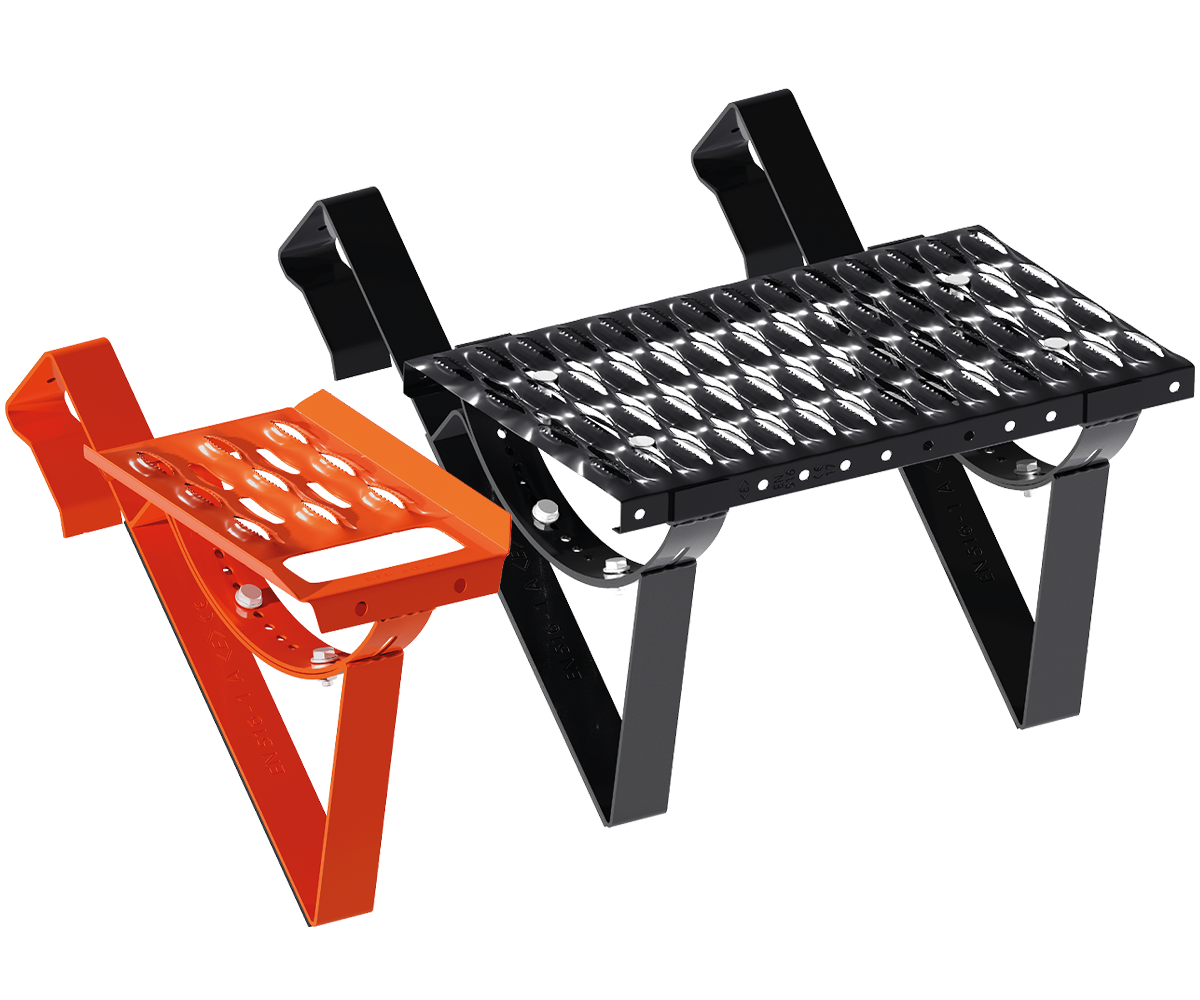
Eurovent® PLATFORM SET – The set includes the Eurovent® PLATFORM roof walkway, two Eurovent® GRIP cradles, and two Eurovent® SUPPORT DB-DC brackets.
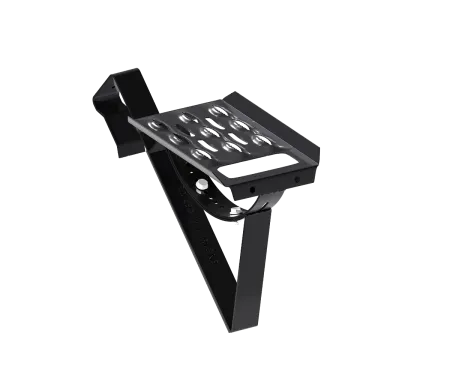
Eurovent® STEP SET – The set includes two Eurovent® STEP SET roof steps, the Eurovent® STEP roof step, and two Eurovent® SUPPORT DB-DC brackets.
These components allow the creation of functional and durable roof access paths on pitched roofs covered with concrete or clay roof tiles.
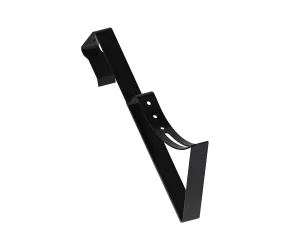
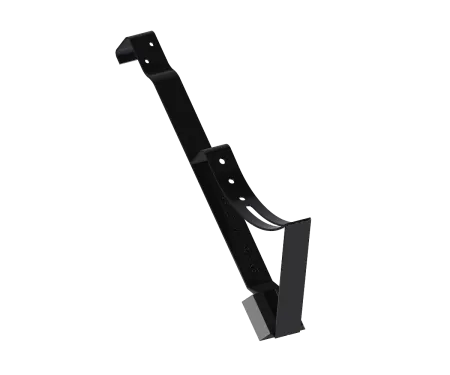
Installation of the Eurovent® SUPPORT roof access bracket
Roof covering: Roof tiles
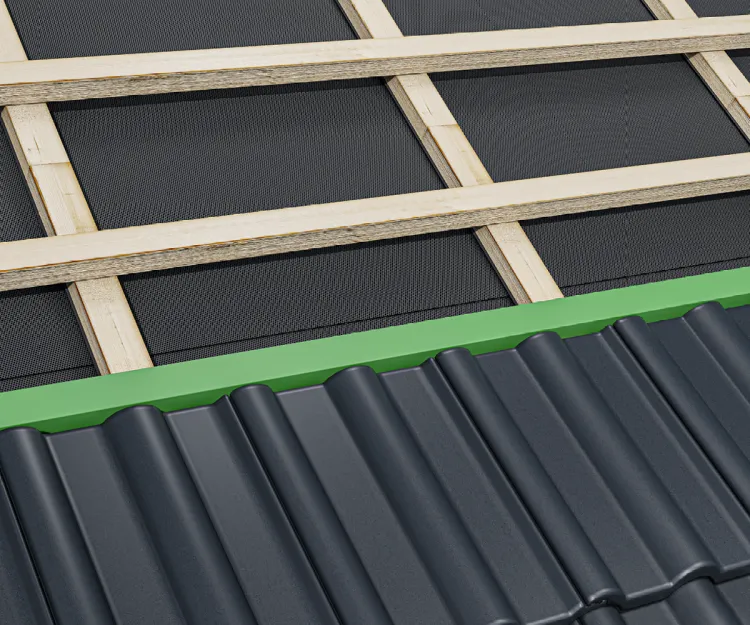
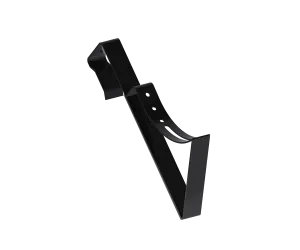
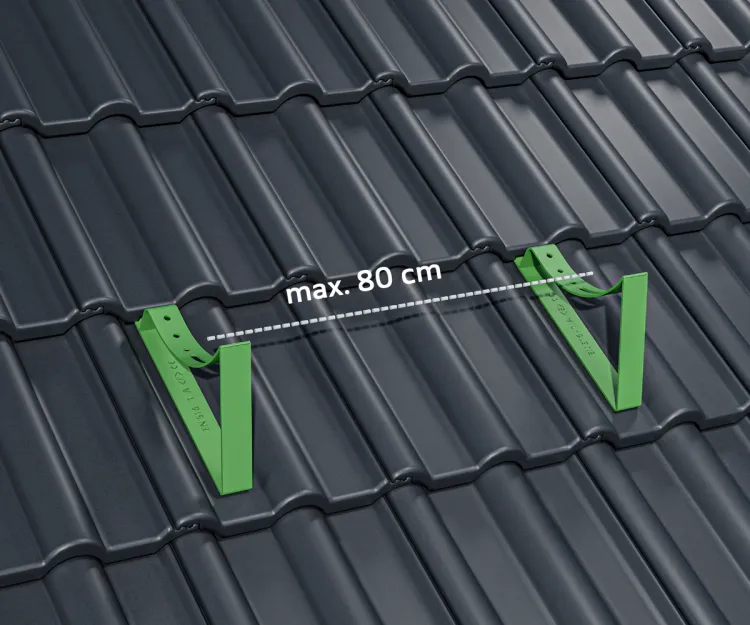
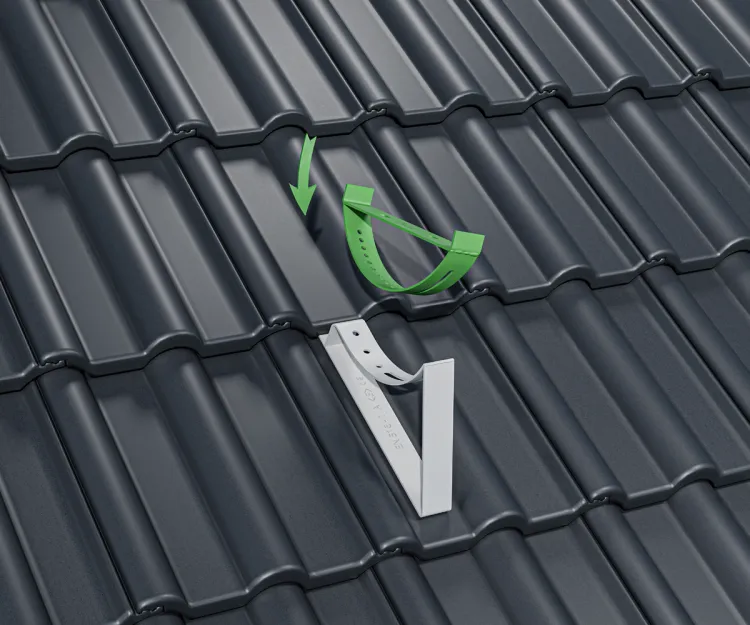
1. Install an additional mounting batten above the structural batten at the bracket installation point. Ensure that the lower row of roof tiles has been properly installed.
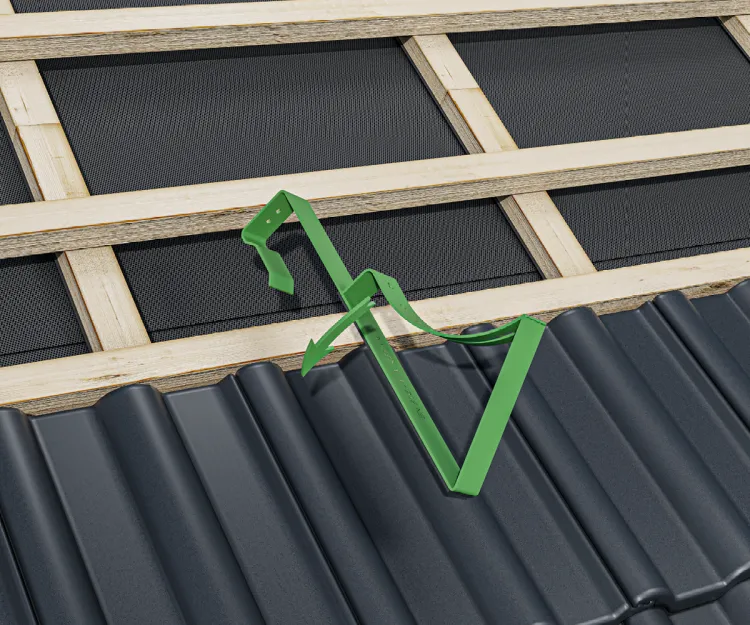
2. Position the first bracket at the installation point.
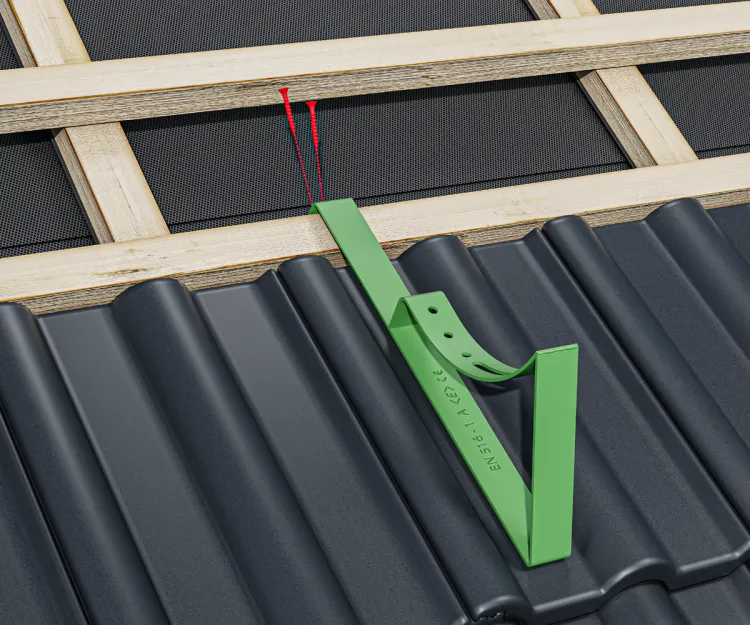
3. Fasten the bracket using galvanized wood screws. Repeat the same steps when installing additional Eurovent® SUPPORT brackets.
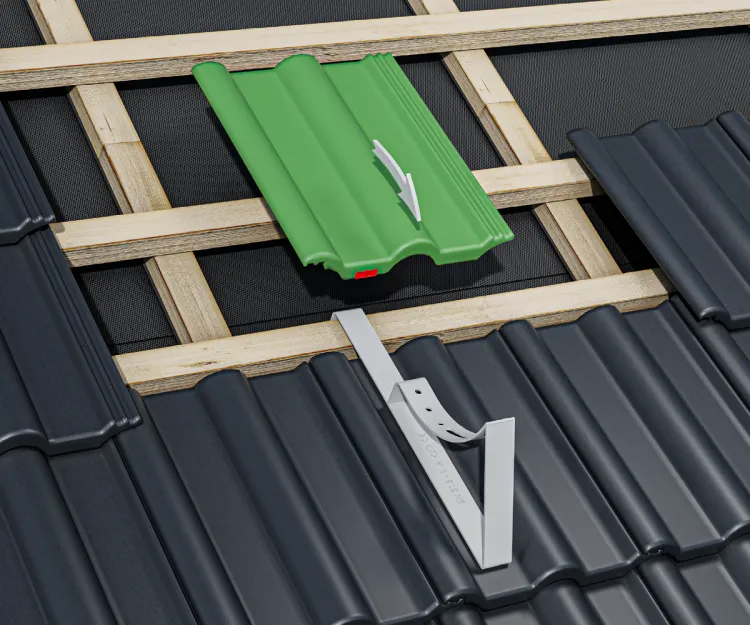
4. In the roof tiles overlapping the installed brackets, a cut should be made in the tile interlock to prevent uneven positioning of the roof tiles.
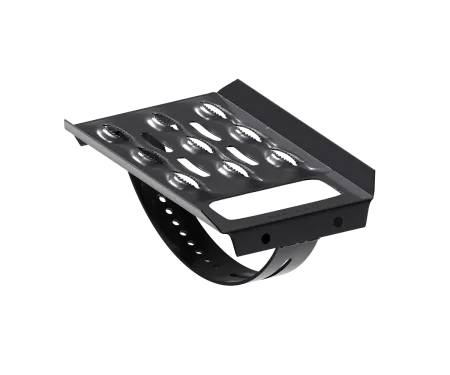
Installation of the Eurovent® STEP roof step
Roof covering: Roof tiles
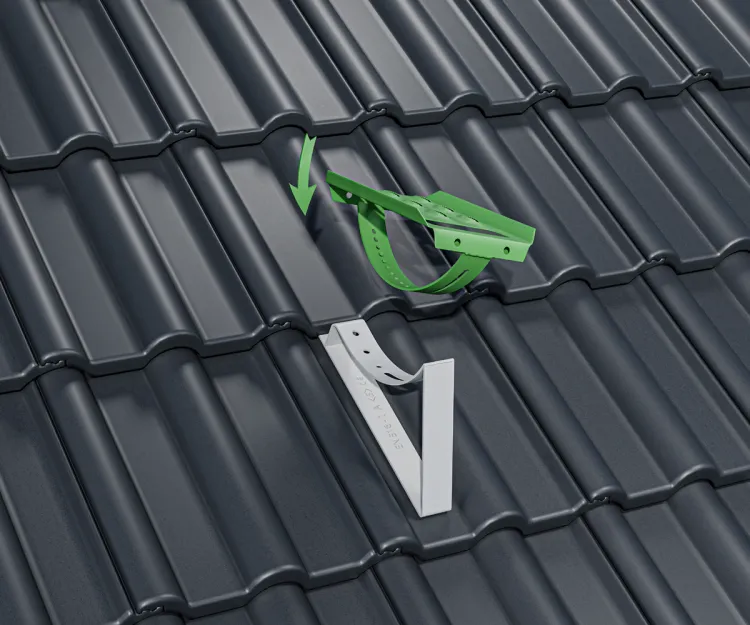
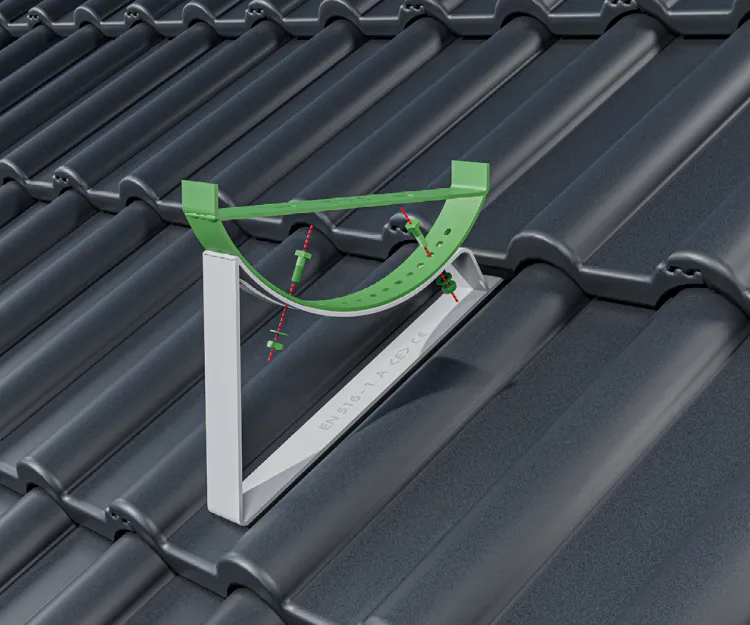
1. Prepare the Eurovent® STEP roof step and position it on the Eurovent® SUPPORT bracket.
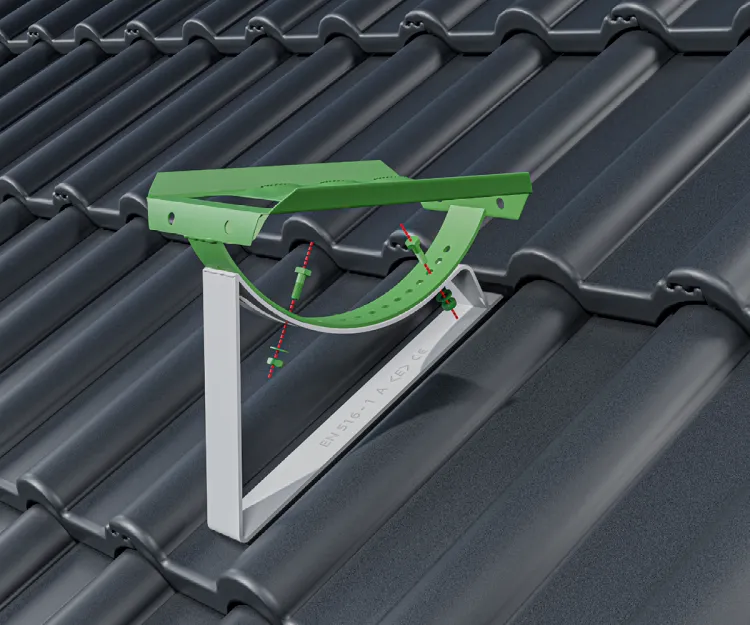
2. Fasten the roof step to the Eurovent® SUPPORT bracket using the two M8 bolts, two washers and two nuts included in the set, as shown in the diagram.
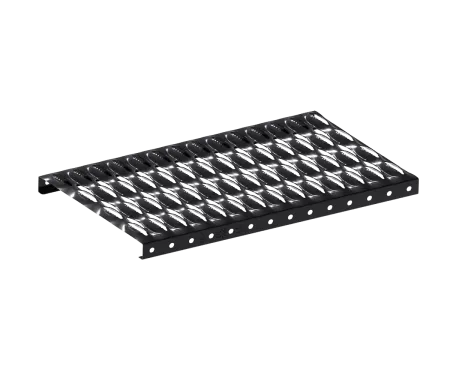
Installation of the Eurovent® PLATFORM roof walkway
Roof covering: Roof tiles
1. The installation of the roof walkway requires at least two Eurovent® SUPPORT brackets.
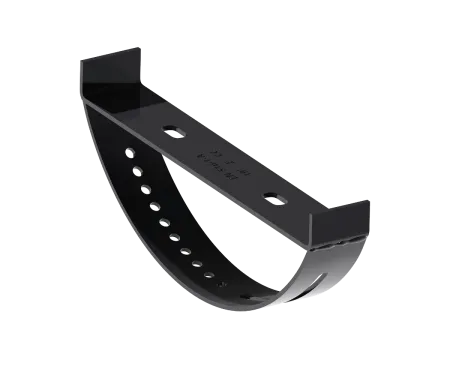
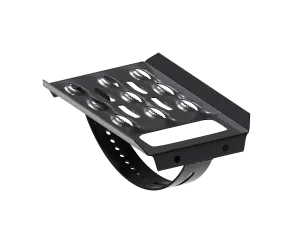
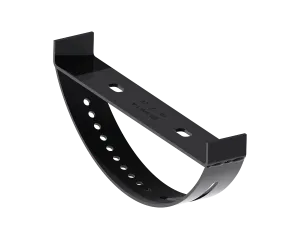
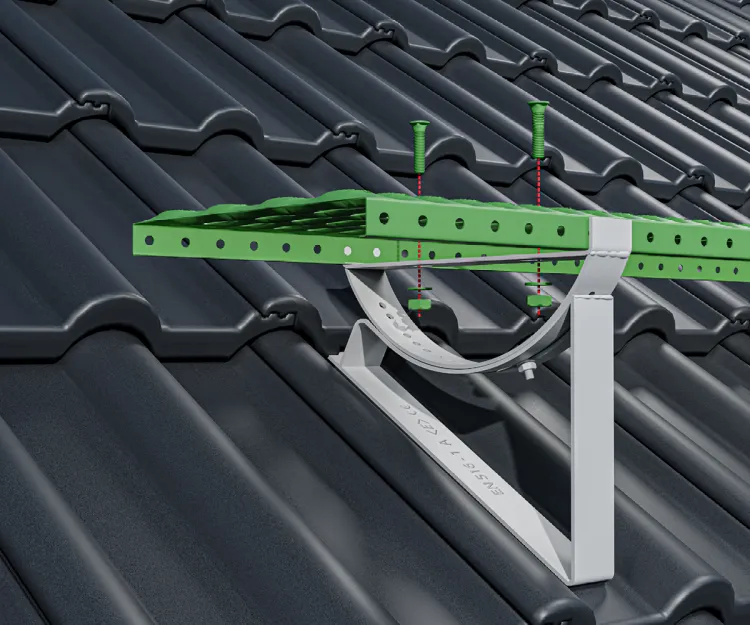
2. Prepare the Eurovent® GRIP roof walkway cradle and position it on the Eurovent® SUPPORT brackets fixed to the roof covering.
3. Fasten the Eurovent® GRIP roof walkway cradle to the Eurovent® SUPPORT bracket using the two M8 bolts, two washers and two nuts included in the set, as shown in the diagram.

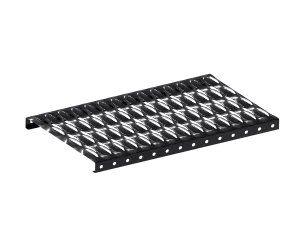
4. Prepare the Eurovent® PLATFORM roof walkway for installation and place it on the Eurovent® SUPPORT brackets fitted with the Eurovent® GRIP cradles.
5A. Fasten the Eurovent® PLATFORM roof walkway to the two Eurovent® SUPPORT brackets with Eurovent® GRIP cradles using the four M8 flat-head bolts, four washers and four nuts included in the set, as shown in the diagram.

5B. Ensure that the Eurovent® PLATFORM roof walkway is properly secured to the Eurovent® GRIP cradles and the Eurovent® SUPPORT brackets.
Installation of the Eurovent® LINK roof walkway connectors
Roof covering: Roof tiles
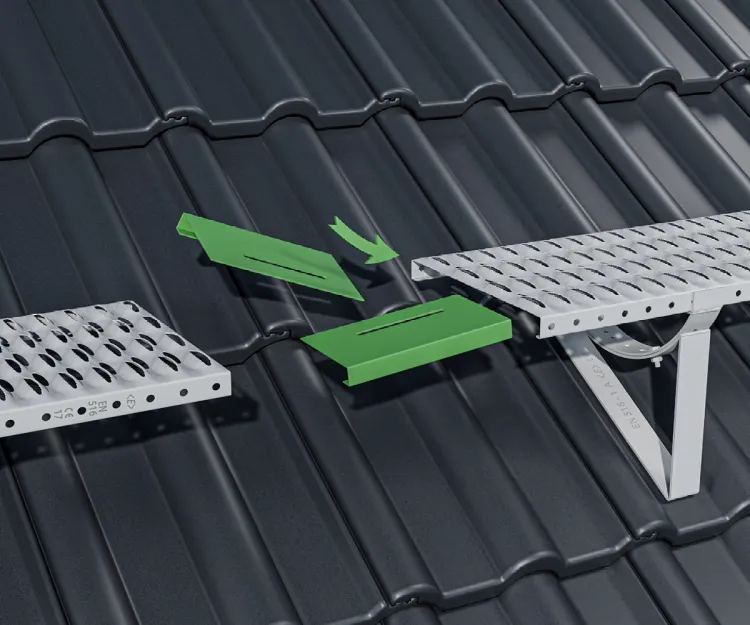
Eurovent® PLATFORM SET roof walkway systems can be connected together to create a continuous roof access path.
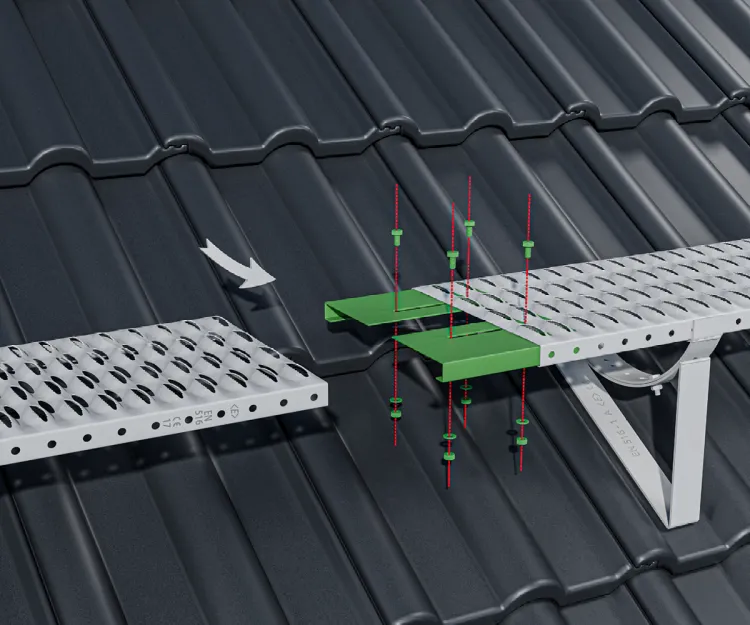
The connection is made using two Eurovent® LINK connectors installed between the Eurovent® PLATFORM roof walkways. Note: A Eurovent® SUPPORT bracket must be installed at the connection point.
Maintenance of the Eurovent® roof access system – how to properly care for roof walkways and steps
Cleaning, inspection and maintenance instructions for a roof access system compliant with EN 516.
The Eurovent® roof access system, including PLATFORM roof walkways, STEP roof steps and SUPPORT brackets, requires regular maintenance to ensure proper functionality, user safety and long-term durability of the structure.
Regardless of the roof covering type (including concrete or clay roof tiles), inspections should be carried out at least once a year.
What does the annual maintenance of the roof access system include?
1. Cleaning the system components
- Remove any accumulated debris from the roof walkways and steps, such as leaves and branches, dust and atmospheric deposits, as well as bird nests and droppings.
- Use mild cleaning agents, neutral or slightly alkaline detergents that are commonly available.
- Do not use pressure washers, as they may damage the protective coating or weaken the mounting connections.
2. Technical inspection of mounting components
- Check the rigidity and stability of the connections between the individual system components.
- Inspect all bolts and nuts and tighten them if any looseness is detected.
- If signs of corrosion are found, clean the affected area and restore the protective coating using recommended anti-corrosion products.
3. Inspection of the roof covering in the installation area
- Check whether any leaks or damage have occurred around the mounting points of the Eurovent® SUPPORT brackets on the roof slope.
- If necessary, apply an appropriate roofing sealant.
Is roof safety system maintenance important?
Regular maintenance of the Eurovent® roof access system is not only the responsibility of the user, but above all an investment in the safety and durability of the roof structure.
Well-designed roof walkways and steps require only simple maintenance procedures to ensure safe and convenient access to critical areas of the roof for many years.
Extends the service life of metal components on the roof. Reduces the risk of corrosion or mechanical weakening of the system. Ensures full compliance with the EN 516 standard for roof access safety. Guarantees that roof walkways and steps continue to perform their function — providing safe access to chimneys, PV panels, roof hatches and antennas.
Final information
The information, recommendations and guidelines contained herein are provided to the best of our current knowledge, research and experience, and in good faith. We assume no liability for the consequences of improper or incorrect use of our products. Each user of this material should verify, by all possible means, including testing the final product under appropriate conditions, the suitability of the supplied materials for achieving the intended purpose.
All installation, maintenance and technical inspection work should be carried out only by authorized, qualified and experienced personnel.


